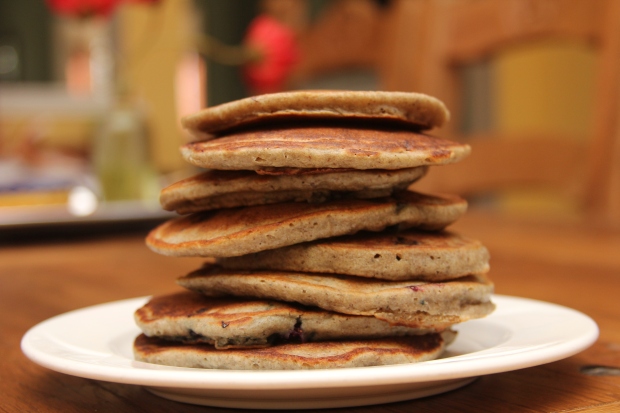
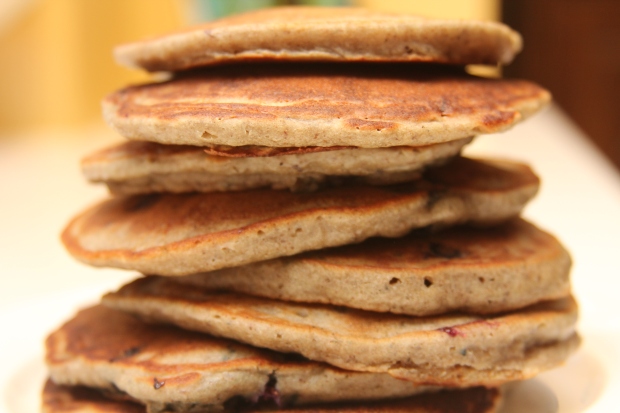
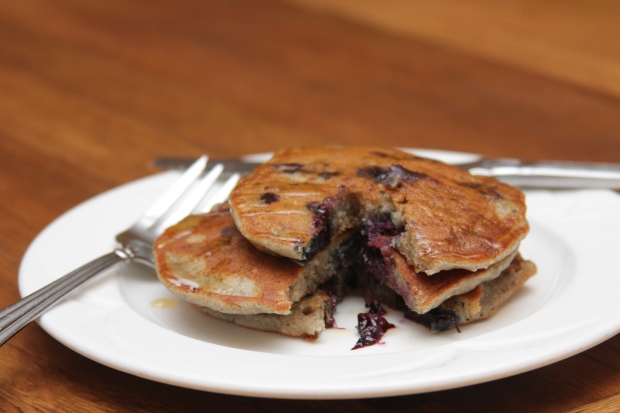
Banana Nut Muffins of the Gluten-Free, Sugar-Free Variety!

So I know that I just posted about trying to eliminate grains from my diet.

BUT.

Well, two things. 1) My kid still eats grains (though I try to limit hers too) and LOVES muffins and 2) These are really good!

So in the interest of sharing, I thought I’d share this li’l recipe I’ve been tweaking for a while now. They started out with a complete oat flour base, but since I’m slowly trying to get more of the grains out of my diet, I tried adding some other flours in there last time. And what do you know? They turned out better than ever. And the best part? No added sugar. Just natural sweetness, which is of course the best kind!

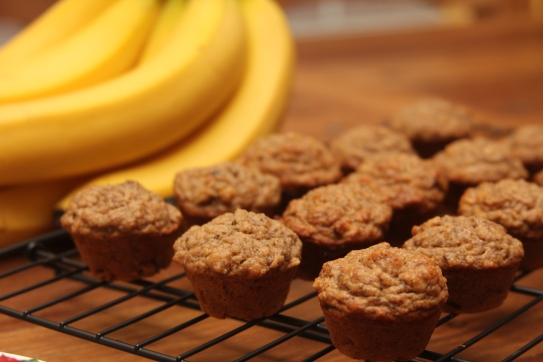
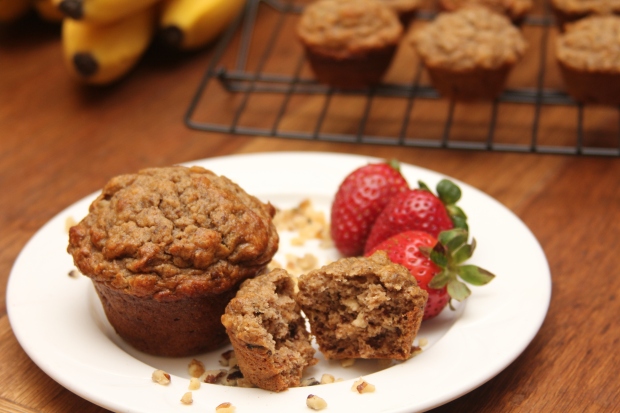
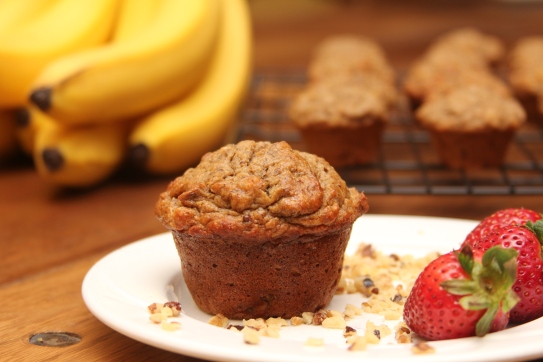
So without further ado, I give to you my Gluten-Free, Refined Sugar-Free, and almost Dairy-Free Banana Nut Muffins. How’s that for a mouthful?!

IMG_9894

Here’s what you’ll need:

1 cup of GF oat flour
1/2 cup of chopped walnuts (or pecans)
1/4 cup almond flour
1/4 cup coconut flour
1 tbsp. ground flax seeds
1.5 tsp. of baking soda
1 tsp. cinnamon

3 very, very ripe bananas
2 eggs
3 pitted dates (or an extra banana should work too!)
2 tbsp. butter
1/4 cup plain yogurt
1/4 cup unsweetened applesauce
2 tbsp. butter
1 tsp. pure vanilla extract

Mix your dry ingredients in a small bowl and set aside. Mash your bananas, then add in the rest of your wet ingredients. Then slowly add in the mixture of dry ingredients. Bake for 20-25 minutes at 350 degrees (F).

These are best enjoyed straight from the oven. Well, not straight from the oven, but you know what I mean:) Top with a little butter and raw honey if you feel so inclined and want them to be just a touch sweeter! We made minis, but you could do regular size or a bread loaf.

IMG_9898

IMG_9889

As you can see, I couldn’t keep those little fingers away!

IMG_9907

*To make these dairy-free, I’d substitute the butter for coconut oil and the yogurt for a non-dairy milk*

Doctor’s Orders

It’s been just over two weeks now since I saw my new doctor. The one I talked about in my very first post. I knew the minute I stepped foot into the lobby that it was going to be a perfect fit for me. On the TV in the corner, there were short videos streaming. The three that I saw/heard as I was filling out paperwork involved the difference between store bought eggs and real, pasture-raised, roaming chicken eggs, how to pick out non-toxic baby products, and one of the doctor visiting a farmer’s market in Hawaii. The doctor himself was in all of the videos discussing each topic. Like I said, I immediately knew he would be a good fit for my healthcare needs.

He went ahead and switched my thyroid medication from Synthroid to Armour Thyroid (generic), and proceeded to tell me that he hopes to get me off of it altogether. What?!? That’s not at all what my previous doctor told me. She said, and I quote, “You’ll be on Synthroid for the rest of your life!” So things were already off to a great start, as I really prefer the idea of not being on medication my whole life.

Aside from taking the medication, I asked what else I should be doing to support my thyroid function naturally. His response was that it was mostly going to be lifestyle things, primarily diet. He said I need to do my best not to eat any wheat, dairy, or sugar, and to avoid all grains as much as possible, i.e. the Paleo Diet. I’m not going to lie, this is tough for me. In those two weeks since I went to see him, I’ve done great with the no wheat (I had already been gluten-free for coming up on a year), no dairy, and no sugar. Surprisingly, the dairy has been harder to give up than the sugar. But perhaps hardest of all has been the grains. When I went gluten-free, I started using oat flour for most of my baking needs and I eat rice and quinoa very regularly.

For now I’ve decided that I can’t handle giving it all up at once. Mostly because I still need ideas on what to eat that meets his criteria but also doesn’t upset my stomach. However, I haven’t had the time or energy lately to do too much research into good, Paleo recipes. So for now, I’m mostly focusing on eliminating dairy and sugar (about 90%) and just limiting my intake of grains, rather than eliminating it.

The next thing he told me was probably the most surprising simply because it hadn’t been on my radar at all, though it probably should have been. He asked if I drink tap water. Well, yes, I do. He then proceeded to tell me that I need to purchase a Berkey water filter, or one similar that will remove fluoride from my water. Interesting.
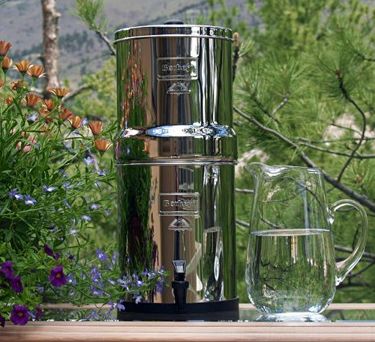
big-berkey-water-filter-2

I’ve yet to order the filter (they’re expensive!), but I have been doing my homework on the issue, and at this point have decided I definitely need one. Just have to save up a little bit first. Anyway, back to fluoride. In our drinking water.

The purpose of this is supposed to be to help protect our teeth from decay. But from what I’ve read, it doesn’t work. And why would it? The water is only on our teeth long enough for us to swallow it. Then it’s ingested, where it can cause all sorts of issues. The most alarming side effect for me personally is of that on the thyroid gland. In fact, fluoride was used in the past to treat hyperthyroidism because of it’s ability to slow down thyroid function! Instances of hypothyroidism in America are on the rise, and I have to wonder if all of the environmental toxins (i.e. “endocrine disruptors”), in addition to fluoride in our drinking water are helping to contribute to that. Aside from thyroid issues, it can also cause gastrointestinal problems, including nausea and pain. Hmm, that sounds familiar. I’m not saying that all of my stomach issues are related to drinking fluoride, but at this point, I can’t rule it out, and will do just about anything to fix it.

So the conclusion that I’ve come to after researching this issue a bit further is that I should avoid fluoride in my drinking and cooking water as much as possible. I’m not convinced that drinking it is helping anyone with tooth decay, and I also feel that that’s not a good reason for me personally to drink it. I see a dentist regularly and may still use fluoridated toothpaste just to be on the safe side. So I don’t feel that the benefits of ingesting fluoride outweigh the possible risks for me.

You can read more about fluoride in drinking water here: http://fluoridealert.org/issues/water/

and an article from the WHO here: http://www.who.int/water_sanitation_health/publications/fluoride_drinking_water_full.pdf?ua=1

I find it interesting that most developed nations do not fluoridate their water, including 97% of Western Europe. Here’s why: http://fluoridealert.org/content/europe-statements/

Did you know there was fluoride in our drinking water? Do you use a fluoride filter?
Homemade Organic Yogurt

My kid is a yogurt fiend. Every morning when I ask what she wants for breakfast, the answer is “lodurt”, which is toddler speak for yogurt. Actually I usually don’t even ask anymore; it’s just a given that she will have yogurt for breakfast.

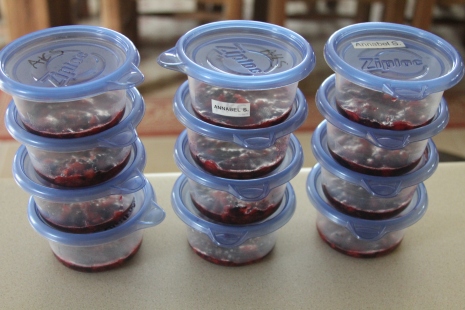
I also enjoy yogurt for breakfast, so for months we’ve been eating lots of it. In order to bulk hers up a bit, I pre-make small containers of mix-ins that I just pop out of the freezer each morning.

IMG_9276

Every two weeks or so, I buy strawberries and blackberries that I puree along with fresh kale and spinach from our garden, ground flax seeds, and hemp seed powder. Then I just mix that up with her yogurt, and she gets a kick out of watching her yogurt turn pink. Although probably high in sugar, between the natural sugars in the yogurt and fruit (there is no added sugar), I still feel pretty good about this breakfast for her. It’s got fruit, veggies, protein, and good fat. But up until a few months ago, the yogurt wasn’t organic.

I hated not getting organic yogurt, but we’ve always gone through so much, that I couldn’t justify spending $9/week on yogurt. That’s when I got the idea to make my own. I’d seen plenty of posts about it online and in other blogs, and it seemed simple enough. So I gave it a try, and since then haven’t gone back.

Now I can get make an entire gallon of organic yogurt for just a fraction more than the cost of buying just a pint. AND there are no added ingredients, which makes me really happy.

The process is really quite simple. Take your milk (I use full fat) and pour it into a pot (however much milk you use is how much yogurt you’ll get). Turn on low heat and gradually build up. You want the milk to get around 180 degrees (F), but you don’t want to scorch it, so that’s why you want to start with low heat.

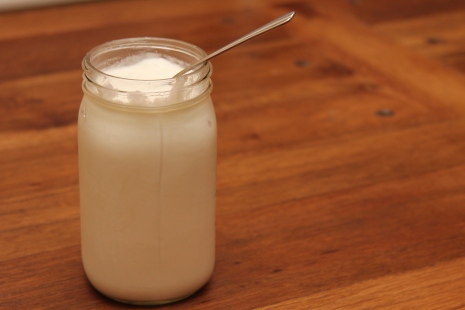
Once your milk has reached between 180-190 degrees, remove from heat and let cool to 115-120 degrees. You may have gathered by now that you’ll need a cooking thermometer for this little project! Once your milk has cooled, you’re going to add your “starter”. This will be store bought yogurt for the first time. After the first time you make it, you can use your own yogurt as the starter. Make sure that the yogurt you buy is listed as having “live and active cultures”, so that you can be sure that your homemade yogurt will as well. I usually set out my mason jars and add about a tablespoon of starter yogurt to each jar. Then pour your cooled milk into each container and stir to ensure that the yogurt mixes completely with the milk.

Now you just need to let your milk sit in a warm place. Some people wrap their jars in heating pads, some in towels. I’ve read about some people placing the jars in the oven since it’s more insulated. What I’ve found to be the best is to place them in an airtight cooler with warm water (no warmer than 120 degrees). This seems to speed up the process, and I’ve never had any issues. In this scenario, your yogurt will probably need to sit for around 4 hours. However, you can leave it there longer. The longer you leave it, the more tart it becomes as more of the sugars disappear.

IMG_9823

After your yogurt has set, place it in the refrigerator overnight, and enjoy the next morning! It will firm up more in the refrigerator, so don’t worry if it’s still a little runny when you put it in there.

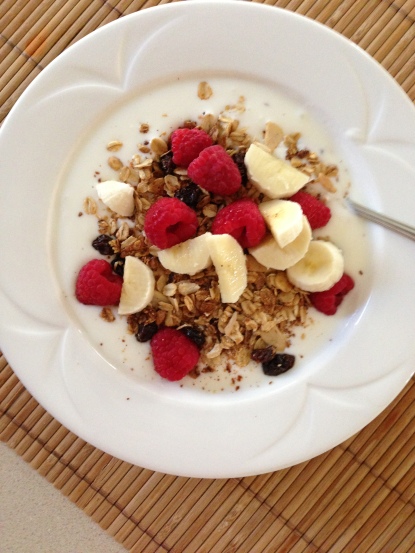
I enjoy mine covered in homemade granola, bananas, and fresh berries.

IMG_4313

As I said previously, this probably has too much sugar, even if it’s naturally occurring sugar. I’m in the process of trying to eliminate almost all dairy and most grains from my diet, so I’m looking for new breakfast ideas. But this will still be great for the occasional treat, and it’s amazingly delicious!

Detoxing My Armpits

That’s right, I’m going there. In my third post, no less. I told you guys in my first post that I would be attempting to detoxify all of my health and beauty products this year, but I bet you weren’t thinking about deodorant, were you?

Well, here’s the thing. Your skin is your biggest organ, and it’s extremely permeable. Meaning that a lot of what you put on it, goes straight into your bloodstream, with no barriers and can wreak havoc. So what you put on your body is as important (if not more so) than what you put in it. Because at least the stuff that you eat is broken down by enzymes in your saliva and liver first. I’ve had these two mixed up for the last several years. I’ve been so focused on cleaning up the food that I’ve ingested, that I’ve paid virtually no attention to the things I’m absorbing through my skin. This is bad.

Since I can’t do everything at once, I’ve started with the two things that I use everyday: deodorant and lotion. I’ll save the lotion post for another day.

I stopped using an antiperspirant years ago because something about applying something to my skin to prevent me from sweating (which is totally natural and necessary to release toxins) just didn’t sit right. But I never went beyond that. I never even purchased a “natural” or organic deodorant. You could certainly do that, and it would probably be just as safe as the recipe I’m about to share with you.

But I’m cheap. And anything with the words “organic” or “all-natural” on them tend to be about ten times as expensive as their synthetic counterparts. So when I started thinking about cleaning up the products that I use on my skin, I immediately asked my friend and guru for all things healthy. She replied that she makes her own deodorant. I must admit that I was a little skeptical. I’d never heard of such a thing! People really did this?

Well, I’m here to report that they do! Just google “homemade deodorant” and you will quickly see that there are a LOT of people making their own deodorant these days. And most of them are using the same recipe that I’m going to post here. Why? Because it works! And I happened to already have every single item on the very short ingredient list, so it cost me nothing (at the time) to make it. Perhaps you have these things as well:

Coconut oil
Arrowroot starch (I think cornstarch would also work)
Baking soda
Essential oil(s)- (optional)

The amounts of each depend on how much deodorant you want to make. But the basic ratio is that you want equal parts baking soda and starch. Then you want about one and a half times that in coconut oil and several drops of your essential oil.

So a standard recipe (and the one that I used) is this:

1/4 cup Arrowroot Starch
1/4 cup Baking Soda
6-8 tbsp Coconut Oil
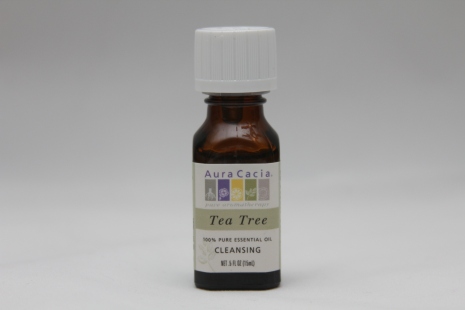
Several drops of Tea Tree Oil

I chose tea tree oil for it’s cleansing and anti-fungal effects. And it smells good, so there’s that.

IMG_9691

Just mix your dry ingredients and then slowly mix in your coconut oil. Don’t melt it, just blend it in at room temperature so that the whole mixture remains solid. Once you’ve mixed it all together, you can add your essential oils if you’re going to.

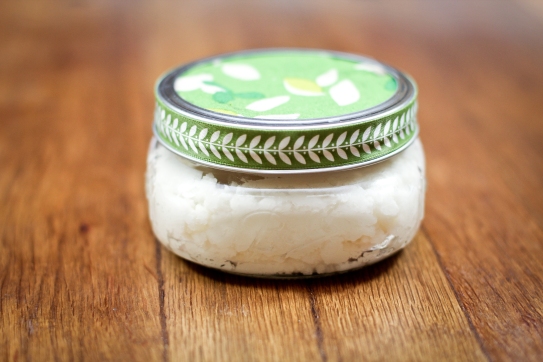
Next put it in a container. I just used a shallow mason jar because that’s what I had, but you could also use an old deodorant container or whatever you prefer.

 IMG_9567-2

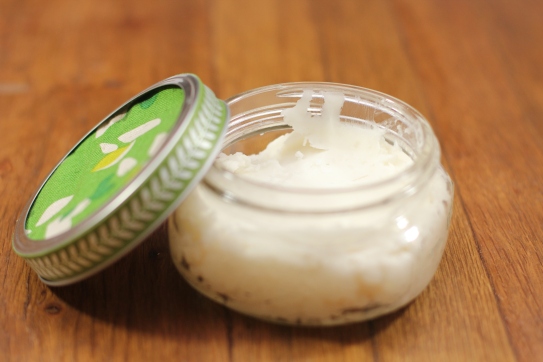
Since mine is in a jar, I have to use my fingers to apply. I thought I would have to rinse my hands off afterwards, but I’ve found there’s really no need. Because coconut oil is solid when it’s below 76 degrees (F), this deodorant has pretty much the exact consistency as any other deodorant. But because your body is warmer than 76 degrees, the coconut oil melts upon contact with your skin, making it very easy to apply.

IMG_9569

The best thing about this deodorant (aside from the fact that it’s all natural and safe) is that it works! With my old deodorant, I could still smell the sweat mixed with the deodorant on my shirts. Not so with this stuff. There is literally no smell at all, unless you count the hint of tea tree oil. That makes me happy. Hopefully it will make you happy too!

Now go forth and detoxify your armpits!

Buckwheat + Almond Pancakes

So of course my first real post is about food. What else? In my quest to reduce the amount of grains in my diet (in addition to being gluten-free), I spent a big chunk of the weekend experimenting with my almond flour. That stuff’s expensive, so it’s not exactly the kind of thing you just want to “play around” with. Luckily, I had moderate success with the cookies and muffins I made.

But the biggest success of the weekend? These babies:

IMG_9659

So delicious. I woke up this morning with a hankering for pancakes. I knew I had some GF pancake mix in the pantry, but wanted to try out the buckwheat flour that had been sitting in there even longer. When I was a kid, my dad used to make us buckwheat pancakes topped with pure, West Virginia (where he’s from) maple syrup. And what did we do? We complained that they didn’t taste like “normal” pancakes and protested that the syrup wasn’t the good stuff. You know, the corn syrup-laden stuff you buy at the grocery store.

When I spotted buckwheat flour in an Asian market several months ago, I scooped it up, remembering those pancakes, hoping I could recreate them and now, with age and wisdom, could appreciate them. And indeed I did. Appreciate them, that is. You were right, Dad.

I also wanted to incorporate the almond flour, so I started searching for a recipe, but I didn’t like anything I found. So I made up my own. And, wow. These were delicious! I would eat these over any “normal” pancake recipe any day! These are grain-free, dairy-free, and refined sugar-free.What’s not to love about that?

Here’s what you need:

1 cup buckwheat flour
1/4 cup almond flour
1/4 cup arrowroot starch
2 tsp. ground flax seeds (optional)
1 tsp. baking soda
1/2 tsp. cinnamon

1 cup coconut milk
1 egg
2 tbsp. coconut oil (melted)
2 tbsp. honey
2 tsp. lemon juice
1 tsp. vanilla extract
3/4 cup blueberries (optional)

Before you do anything else, mix your coconut milk and lemon juice and set aside. Then pull your egg out of the refrigerator, so that it won’t be so cold. Next, mix your dry ingredients together and set aside.

Now go back to your coconut milk and lemon juice mixture and add all of the other wet ingredients. It’s best if this mixture is room temperature, so that the coconut oil doesn’t re-congeal.

Now you can fold your blueberries in if you’re using them. I eyeballed this, and think I used about 3/4 of a cup, but you can use more or less depending on how many you want!

Then just cook on the griddle the way you would cook any other pancake. If your batter is feeling a little too thick, you can add in a tablespoon of water. Repeat if necessary. I only had to do this once.

This is your result:

IMG_9663

Top with generous amounts of butter or coconut oil and maple syrup. Or, if you don’t have any real maple syrup and don’t want to eat refined sugar, you can do what I did and top with a little honey. Either way is delicious.

If you have a hungry kid around, feed some to him/her:

IMG_9651

IMG_9649

Watch with pride as he/she gobbles it all down, and pat yourself on the back knowing that they have a belly full of nutritious and delicious food.

Then enjoy some for yourself.

IMG_9672

See how easy that was? 🙂

2014: The Year of Health & Wellness

Hi. My name is Adrianne.

I’m married to a wonderful and supportive man.

IMG_6661

Together we have a beautiful and spunky two year old daughter. No, I’m not biased at all:)

IMG_6128 (2)

From the outside, all appears well. From the outside, I think I look like a reasonably young, reasonably fit and healthy woman. In other words, I don’t think people see me and think I look sickly. Yet for many years, I have felt ill. All of my life I’ve struggled with gastrointestinal problems, leading to many stomach aches and lots of inexplicable nausea. In addition to that, I have bad chronic back pain resulting from a fall almost ten years ago. Most days I have extreme fatigue, random body aches,  a sore back, an extreme intolerance to cold, and poor memory and concentration. All of that contributes to a mounting sense of anxiety, a lump in my throat sensation, and pain when I take a deep breath.

I feel like a complete mess!

I thought I was headed down the road to recovery when I was diagnosed last year with Hashimoto’s Thyroiditis. I felt that I could attribute most of my symptoms to that condition, and assumed that once I was being treated for it, I would start feeling much better. Shortly after that, I discovered that I have a severe intolerance to gluten. I’ve now been gluten-free for around 10 months, and that has helped tremendously with the stomach issues. At this point, even crumbs can make me very sick! So staying away from gluten is imperative. Between those two things, I really thought I had pinpointed my problems.

Yet I still feel terrible. My thyroid levels are where they’re supposed to be, but I have no relief from my thyroid symptoms. And even without the gluten in my diet, I still suffer from the occasional upset stomach and debilitating nausea, and of course the back/neck/shoulder pain is always there.

So this year I’m making some big changes. This is the year that I will start to feel better and get my life back! I still believe that the primary sources of my problems are my thyroid (and perhaps associated conditions), my messed up back, and food sensitivities. Because traditional doctors have failed me thus far, I’ve taken matters into my own hands, done a lot of research, and have decided to take a more natural, “alternative” approach to healing myself.  And since I know that a goal without a plan is just a wish, I’ve planned out how I’m going to accomplish this lifestyle change.

  • New doctor. I’m finally going to see an integrative medicine doctor who can (and will–most traditional doctors will not)  treat my thyroid without synthetic hormones (Synthroid) in favor of a more natural approach (Armor Thyroid). He’s also (according to reviews) well versed in nutrition and favors using a healthy diet to cure many ailments as opposed to drugs. Major plus in my book!
  • Diet. This one is huge and what this blog will mostly focus on. For several years I’ve been on a natural food kick in addition to being gluten-free. But I need to do better. This year I plan to all but eliminate all refined sugars from my diet, opting instead for the occasional honey or pure stevia extract. I need to drastically reduce the amount of dairy I consume, increase vegetables, eat more organic, eliminate almost all of the caffeine (which isn’t much), and try out more completely grain-free options. When I create or come across any amazing recipes, I’ll be sure to share them here. I’ll also be sharing information about the food industry, what’s in our food, etc.
  • Chiropractic care. I’m finally going to see a chiropractor (Jan. 20) to begin the long process of getting my back, neck, and shoulders situated. I’m also hopeful that she can help out with some of my other symptoms.
  • Essential oils. I’m just now starting to research this as a way to help both my thyroid and my stress/anxiety. I look forward to sharing updates here as I learn more.
  • Detoxifying. For the past several years, I’ve focused most of my attention on food issues. However I’ve recently begun to open my eyes to all of the other toxins surrounding me on a daily basis. All of the health and beauty products that I slather onto my skin everyday, the harsh chemicals that I use to clean my house and my clothes….it all needs to go. As a result, I’ll be making a lot of my own products (to save money), and searching for affordable, natural alternatives. I look forward to sharing recipes and information about this as I learn more!

___________________________________________________________________________

So as you can see, there’s a lot to be done. I’m excited about the prospect of feeling better and living my healthiest life, but I know it’s going to take a lot of work. It won’t come free and it won’t come easy, but I’m at a point now where if I don’t start feeling better, I’m afraid I’m going to have a mental breakdown. So I’ll do the work.

I……”Will Work for Wellness”

….and along the way, I’ll share as much information as I can because, as I always like to quote Maya Angelou on, “When you know better, you do better.” And I think we can all be doing better when it comes to living a more natural lifestyle, free of harmful toxins and fake “food.”

Join me!